Creating a Standard Sales Order
- Create a New Sales order
-
- From Quick Create
- From Contact
- From Sales Order List View
- Choose the Customer
- Optional: Choose the Floorplan & Layout
- Overview Tab
-
- There are several required fields that auto-populate with the customer’s information. If any of these are empty when the SO is created, that means you haven’t filled them out from the Customer record.
-
- Store
- Salesperson
- Invoice Address
- Tax Type
- Delivery Address
- Two fields that will not be auto-filled are:
-
- Service Location (Unit #) - Unit #’s correspond to Delivery Addresses. When you add a new Unit #, pay attention to the Delivery Address that’s chosen. If more than one exists, select the address you need before creating the new Unit #. When you change the selected Delivery Address, the associated Unit #’s will also change. This is a way to allow us to store Unit #’s for properties that have multiple delivery addresses.
- Installation Date
- Note: You must fill these two fields out and Apply Changes before you can begin adding order lines
- Order Lines
-
- This is where you can add products and services
- Unit Price will default to the Store Price unless the customer has Spec. Pricing in which case Spec. Pricing will be used.
- Unit Cost will default to the Standard Cost for products and the Store Cost for Services, unless the customer has Spec. Pricing
- After material is picked, the cost of material will be updated to reflect the actual cost
- Order Line Notes can be added but are not required. These notes are visible on the Pick Ticket and Work Order
- Roll Cuts
-
- To add roll cuts, first enter the line total qty and apply changes
- Apply Changes - this step is important. If you begin adding cuts before applying changes, an error will occur.
- After you apply changes, click the scissors icon next to the product name
- To add a cut, specify the cut name, qty (ft), qty (in) and click “Cut”
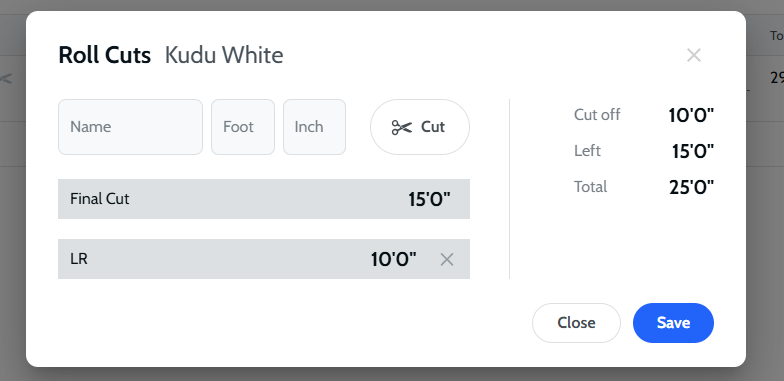
- Final Cut is automatically added to ensure the cut total is never less than the line total. It will disappear when your cut total matches the line total.
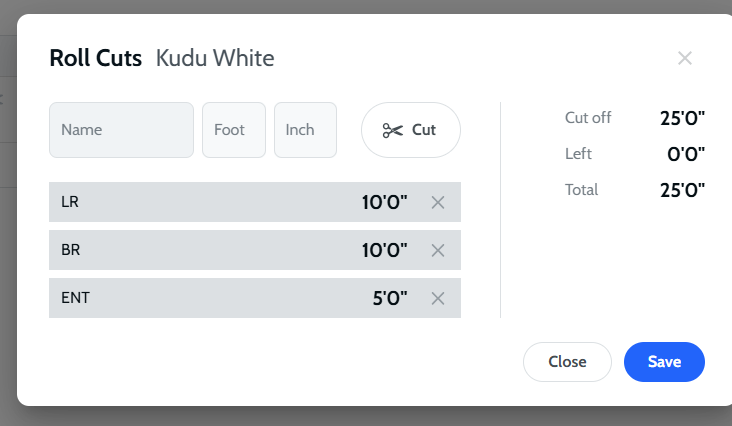
- Cut Off = the total qty of cuts that you’ve added
- Left = Line Qty - Cut Off
- Total = Line Qty
- Important: Save Cuts before closing
- Once you’ve added all of your products and services, return to the Overview Tab
- If everything is correct, you’re ready to Confirm the Sales Order
- Confirming a Sales Order triggers a Work Order and Pick Ticket to be created
- These two documents are accessible from the Sales Order Overview tab, and also from the Field Management and Operations modules
